Page 3 of 3
Once your design is complete, all that’s left to do is finish off with some varnish to protect both the art and the wood. Make sure your paint is completely dry, then apply the varnish in smooth strokes across the entire piece. Once it’s fully dried and cured, you can proudly display it in your space.
Turn A Cardboard Box Into Cleverly Hidden Kitchen Storage With A Savvy DIY

If you’re someone who likes being in the kitchen, chances are that you are always on the hunt for some practical storage. Whether it’s product manuals, coupons, or printed recipes, piles of paper can quickly lead to clutter and disorganization. Individuals who enjoy crafting are in luck, thanks to clever hidden kitchen storage that converts a cardboard box and some old cookbook covers into something useful.
In a video by Canterbury Cottage, the creator puts a fresh spin on the simple concept of upcycling an old cardboard box into a magazine holder. Starting with a cardboard box, she reinforces the seams with some heavy-duty tape. Next, she uses a ruler to draw a 45-degree diagonal line across both wide sides of the box to create the classic magazine holder shape. Next, she takes an old cookbook slipcover, applies glue stick to the inside, and lays it over the cardboard box, pressing firmly to secure it in place.
Finally, she fills it with random pieces of paper and places it on a bookshelf, next to her actual cookbooks. When situated in a row, you’d be hard-pressed to recognize the homemade magazine holder as anything other than another beloved cookbook; this makes it a great solution for those needing more spots to stash papers or even kitchen tools like plastic cutting boards and rolls of plastic wrap.
Making it personal
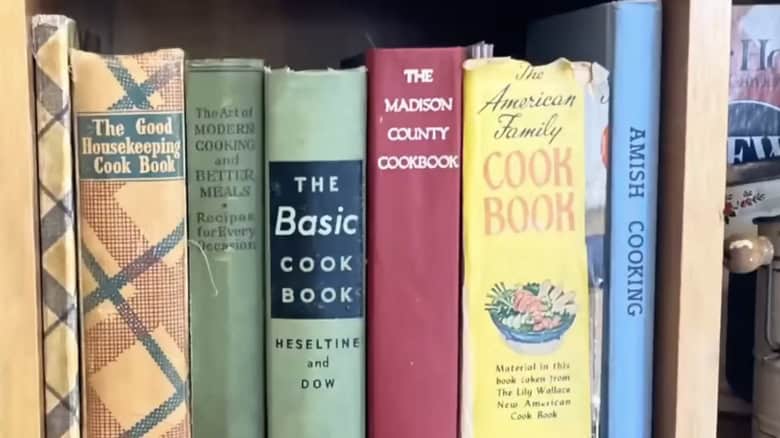
If you want to express your personality a little more with this DIY, you can select from a variety of your favorite recipes, make copies of a selection of recipe cards, then creatively decoupage them to the outside of the cardboard box for a fun and charming aesthetic. Remember to apply multiple coats, like using adhesive and letting it dry between coats. For those who love the idea of the cookbook cover but maybe don’t have a slipcover to spare, check out your local Goodwill or secondhand bookstore; these retailers often have cheap cookbooks so you don’t have to sacrifice your own books.
Another option that will save you from needing a slipcover at all is to paint the entire box in a neutral color, then use a stencil along the visible spine to neatly write “cookbook.” This approach could be a bonus for individuals wanting a little more say over the finished product, as it allows you to completely personalize the color and font on the box.
Lastly, while the creator of the video glued the cover onto the box and called it a day, you can make yours more durable by adding a layer of clear laminating paper over the entire box. The plastic covering will ensure the surface is water-resistant against kitchen splashes, as well as steam and grease that can build up in the cooking space. For more ideas, check out our article on clever kitchen storage solutions.
For More Beautiful Wood Furniture, Paint It Norwegian-Style And Never Go Back
Everyone Used To Collect Them — Now They’re A Budget-Friendly Find For Collage Walls
No More Boring Racks — This ’80s Find Is A Cuter Way To Organize Your Entryway
The DIY Weed Wacker Idea That Seems Genius, But Is Actually A Waste Of Time

Relieves Constipation Instantly! Go to The Toilet Like Clockwork
Trade In The Flimsy Baskets: The Durable Vintage Find That Creates Instant Storage

Use This Amazon Find To DIY Elegant Looking Pavers On A Budget

Arthritis & Knee Pain Will Disappear Forever If You Do This!